Month in the life of an urban gardener: May 2024.
The tasks, problem solving, wildlife spots, learnings and reflections from an organic food grower in a North London kitchen garden.
Welcome to this separate reflection — as part of the Food-Fibre-Fashion publication — on what it’s like to be an urban organic food grower. This started as short snappy videos to condense moments across a month, before realising that actually the narrative and context behind them could be useful, whether successes or mistakes.
As this is part of the wider Food-Fibre-Fashion publication that shares essays, articles and resource newsletters, there will be stories and musings to raise your awareness of how interconnected these systems are, even when we’re looking in small scale, such as an urban garden.
Watch reels of previous months here →
April 2024. / March 2024. / February 2024. / January 2024. / December 2023. / November 2023. / October 2023. / September 2023. / August 2023. / July 2023. / June 2023. / May 2023. / April 2023. / March 2023.
This is the seventh in this series of articles — A Month in the Life of an Urban Gardener. To read about the context of where I work, head to the first article.
Watch May 2024 in the form of a reel here.
Listen here or on Spotify:


Images: 1. Watering newly planted tomatoes on one of the first hot garden days, wearing my garden gnome t-shirt from Story MFG; 2. A honeybee on a borage flower; 3. A solitary bee on a pink opium poppy.
Sowing flax.
May 3rd, finally sowed flax. As usual, this task gets waylaid because it’s my own thing. If I have any spare time, frankly I don’t like to spend it gardening because it’s tiring. Though of course I like my job, I don’t want to do it all the time. I have the garden at home to attend to as well. But, I’m a miniplot holder — a small allotment bed — and so need to utilise this gift I’ve been given.
Seeds were purchased from Flaxland, and due to Brexit it’s been difficult to get hold of a flaxseed variety commonly used for fibre production. Instead, I’m sowing linseed — a shorter variety more commonly used for seed. It’s still the Linum usitatissimum with blue flowers, but I’d more likely save seeds from this than pulling for fibre. Which frankly suits me fine, because every year I forget about it and end up with scraggly straw I won’t ever get to retting. Perhaps also, I can harvest the linseed and try to crush for oil to cure our beehives with… or perhaps that’s too much work and I can simply save the seed and prevent weevils and mice from getting to them for sowing in 2025.


Images: A handful of flaxseeds scattered on a weeded watered bed, then lightly tamped with the back of a rake so seeds make contact with the soil.
Harvesting.
→ Elderflower — Oh what a beautiful crop.
It’s one of my favourite smells, alongside tomatoes and rhubarb. I stick my face in the umbels, getting covered in yellow pollen, spending the rest of the day sneezing, but worth it for that hit of early summer. I’d harvested at home and around my estate to make a couple batches of cordial and syrup, and harvested at work to dehydrate for tea blends. It’s about balance this one; you have to obviously let them flower for pollinators, but the rain and pollution will whisk away the delicate petals, and then you need to let them turn to berries for autumn, for the birds and for your own cough syrups. If you’re not quick enough, the last days will come, and in London it seems especially, the season is short-lived. It’s quite precious. I found loads when visiting a friend in Nottinghamshire, but it was May 31st and I’d already satisfied myself with a last batch.
At the same time as harvesting the pink flowers from my garden, I also harvested some of the leaves. I have a ‘black lace’ variety, and the dark frilly leaves provided some scatty prints via the tannins when bundle dyed onto cotton fabric.
→ Sorrel — perhaps a bit pointless these days.
We used to put the tender leaves in our salad bags, but as we don’t have a salad customer currently, the sorrel plants have gone to seed making the leaves large, chewy and somewhat bitter. I hacked them hard, right to the top of the roots to encourage new growth. Many a mollusc was picked out of that bed.


Images: A large elderflower bigger than my hand, yellow pollen on my face from sniffing an elderflower, elderflowers simmering in a pot of water with lemon to make cordial, and the sorrel bed undergoing a haircut.
→ Chard — just looks after itself.
I’m unsure who actually likes eating chard. It’s chewy and earthy. Yet, it’s a good-looking plant, especially when you get a fun mix of colours. We had a 10 metre bed and two smaller 5 metre beds that needed to be changed over, so over a few days these were cleared. Good leaves were sent to the National Food Service for their food hub, and bad leaves were composted. We ended up planting the two small beds with chard again, simply because they’d been over-sown so we had many plants, and there wasn’t particularly anything else to go in the beds. Not a healthy rotation, mind. After the roots had been removed, because we were low on sieved compost, I amended the soil with a comfrey tea rather than topdressing. As chard looks after itself, I’m not too bothered about giving them too much nutrition, but the soil is claggy and needs some support. It may be worth doing a feed with something else, perhaps some broken down wood chip.
→ Broad beans — a bit of a gross one.
Broad beans tend to be overwintered or sown very early spring, and then harvested in a glut come early summer. The rain this season has brought in molluscs en masse. Coupled with the usual black aphid, the broad beans are stunted and pods slow to develop, or they’ve been nibbled. The beans inside are actually great once podded, but the harvesting itself is sticky and slimy.
→ Spring onions — hit by allium fly.
Unfortunately we were hit hard with allium fly this season, and this time they had gotten to the beautiful spring onions too. While they’re still edible, the leaves were mangled and some larvae were in the bulbs. Spring onions can usually stay in the ground for ages as they have slow growth. Some of ours were coming up to flowering, and we don’t actually want them to seed in the same bed as we’ll switch over or green manure to rectify the soil health. Better to stimy the allium fly early and save what’s possible from the crop, so they all came up. The bed was in fact made into a mini polytunnel with plastic sheeting, and basil plants were put in for a quick crop rotation. This experiment worked last year, so we’re trying again.
→ Garlic — hit by allium fly and rust.
I’d never seen the garlic leaves so rusty. It’s such a weird natural phenomenon that looks cool, but is of course annoying. However, it’s not so bad as allium fly, which is downright gross. The larvae pupate and hatch inside the allium’s bulb, causing the leaves to fall so stunting bulb development, and then obviously you have creepy crawlies to clean out. For spring onions it’s somewhat easier and less harmful because you eat them fresh anyway, but garlic is a bulb that you cure, and if the bulbs are soft and soggy then you can’t cure them so voiding your crop. On this occasion we couldn’t sell them even as the uncured “wet” or ”green” garlic, which is a shame, and so we’re considering not growing garlic at all in the next season.


Images: 1. One of the chard beds mid-harvest where leaves are cut at the base and sorted, before roots are taken out later. 2. Broad bean pods post-harvest are podded to sort their grades; 3. Rust on garlic leaves; 4. Freshly-harvested spring onions; 5. Black aphid on rhubarb flowers with predatory ladybirds.
→ Herbs — they take a while to process.
Finally we had some decent camomile to harvest from, and some lovely rose bushes (including dog rose) so I did some harvesting on a warm day to pop these herbs into our dehydrator, along with elderflower. This was about all I could manage, but the lemon verbena needs a trim, the wormwood is looking bushy, and the oregano has put on good growth. Apart from the initial harvesting time, most herbs then need additional processing before putting into the dehydrator (like removing as much elderflower stem as possible), but if you can get the timing right, then not only are they a cash crop as they are, they’re also really useful for many products (teas, cosmetics, tinctures).


Images: 1. Beautiful pink damask rose, with the castle building in the background; 2. Harvested rose petals from the damask and dogroses; 3. Camomile; 4. A magenta-burgundy tea rose shrub.
Beekeeping.
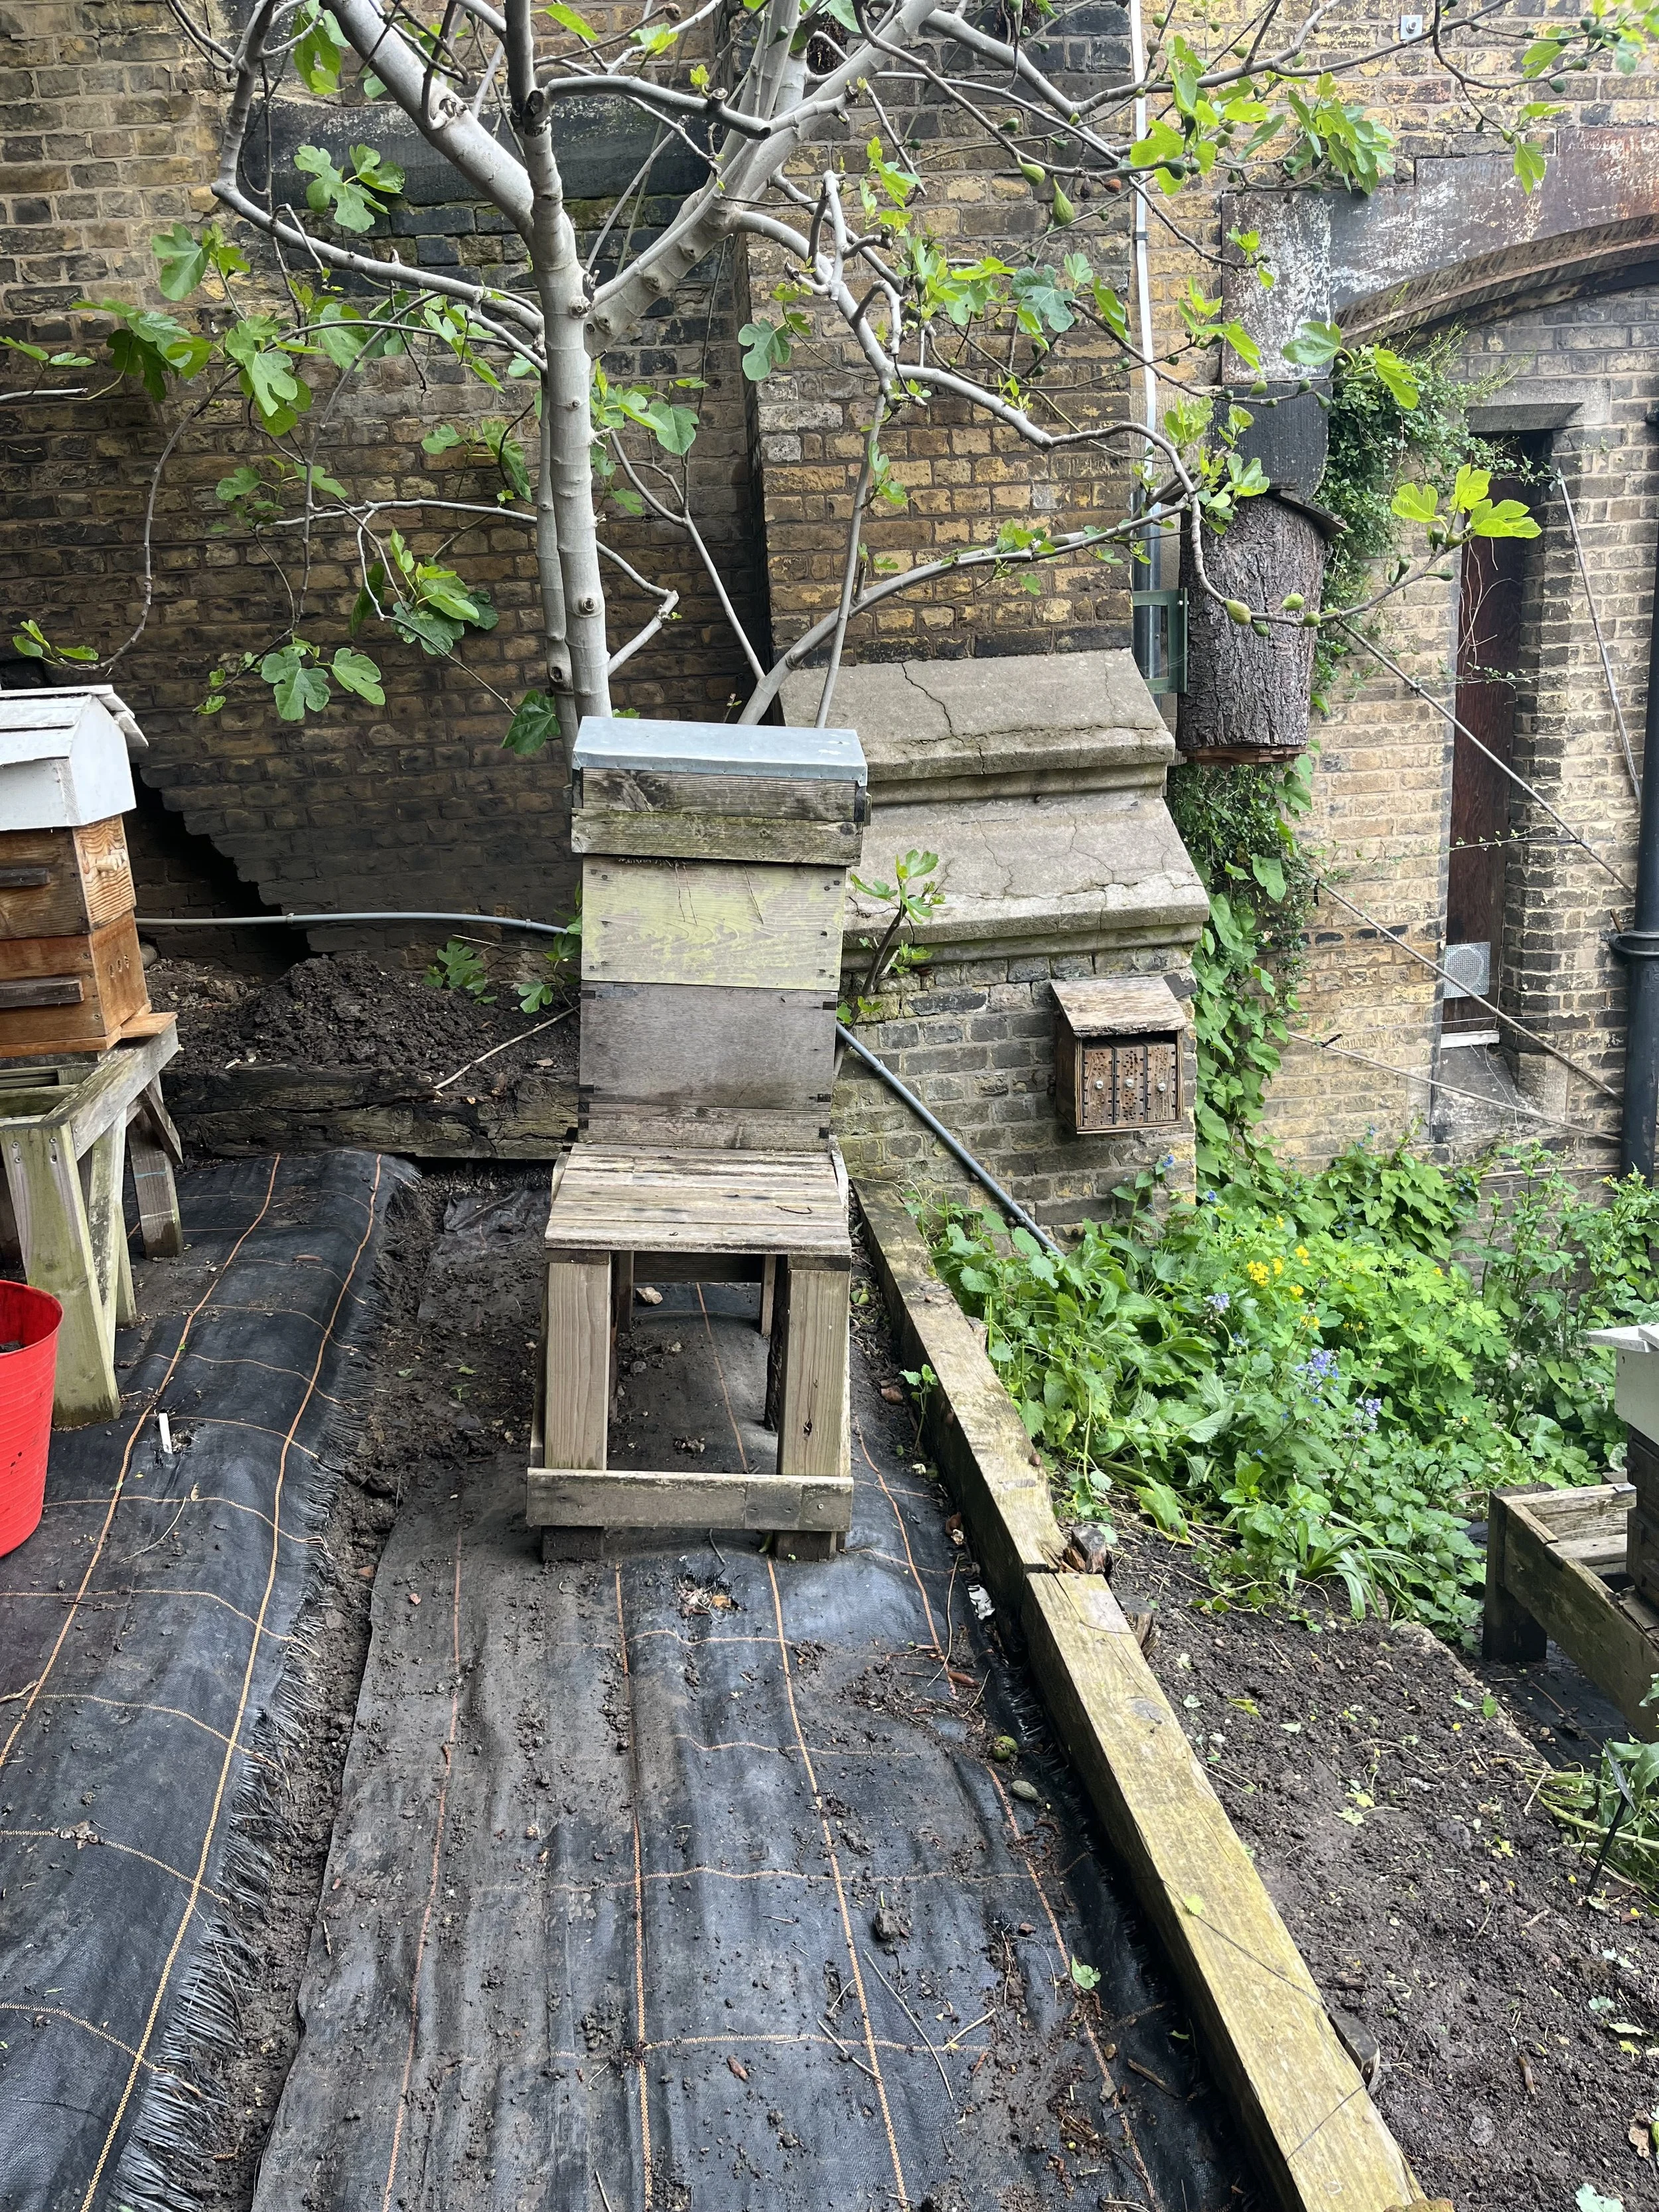
→ Log hive.
On May 1st I went to the garden to check on the newly housed swarm and discovered that a family had moved into our empty log hive. This had been cleared out the previous year by robber bees and wasps, so we were planning on taking it down for a clean and reset. It seems it was clean enough as the family stuck around. They did try to swarm on May 9th; we caught them on video bearding around the base of the hive, but then minutes later crawling back in. Probably they decided they were actually fine, or the mother was too weak, and yet come the end of the month, there was still a high amount of activity even in the rain. The potential issue for a log hive is that we can’t intervene (even if we wanted to); we can peer in the bottom to look at what the comb is like, but we can’t check to see if the mother is alive and healthy, instead only able to observe the foragers.


Images: 1. The log hive with newly housed honeybee family; 2. The start of the log hive's swarm; 3-4. The swarm bearding around the outside and entrance to the log hive.
→ National swarm.
We’d already captured a swarm from the warre hive on April 27th, housed in another warre hive in the apiary, and were waiting for the national-style hive to go. I actually knew it, as I sat down at my desk with coffee for a day of business work on May 7th, that I’d get the call saying there was a swarm. It’s always around the 11am-noontime window, on a sunny clear day. This swarm had landed on an apple tree, but within arm’s reach, and was pretty big at perhaps 10,000 bees (supposedly a rugby ball size is 5000). For this one we did have to slightly cut the branch, rather than shaking them into a box, keeping them relaxed. My swarm colleague held the branch while I cut, and another colleague held a box underneath incase the cluster fell. We then all walked up to the apiary where we shook them off the branch into their new hive.
Because of the tree’s location on the opposite side of the path to the apiary, where stragglers needed to find their way up and over trees to the apiary following pheromones, I set up warning cones — to which centre visitors utterly ignored. Stragglers were a little confused, and everytime I went to go look on them, I’d be followed. After a couple hours they all found their way and the tree was clear, and the box left by the new hive was also clear. Over the following days they were actively flying in and out and comb was being built.
We now had five honeybee families.


Images: 1. Swarm on the branch of an apple tree; 2. The team assemble with pruning saw for the branch, one holding the branch ready to shake, and one with box underneath the bee cluster; 3. Two people in bee suits carrying a honeybee swarm on a branch over an open box; 4. A warre hive with re-housed swarm next to an already established warre hive.
→ Tidying.
The apiary itself was a weedy mess. With the onslaught of swarms it became tricky to get in there to weed, and in fact on one rainy day in there unsuited, I got in the flight path of one forager who landed on my face, stinging me, and of course my reflexes meant I hit her and I got covered in my weedy mud. I saved the weeding for another day. Next time I did go in fully suited as I had to get in between the log and the warre hive, but was worth it because the area became a lot clearer with more space to move around and less chance of plant growth into their flight path.
I was also able to finish off scraping claggy mud from the terraces, so we could move the listing national hive onto a smoother more stable surface. This involved ratchet strapping the hive to its stand, and the two of us simply moved it back and then across so it wasn’t blocking the smaller warre hive behind. Moving hives can confuse foragers because they come back — using the very specific hormonal communication they navigate with — to find that their entrance has moved. They do eventually figure it out, but it’s better to do any moving on a rainy day or at night when less foragers are out. Interestingly, if you want to increase the numbers of foragers in a hive, you can switch hives around during the day, and the switched hive will receive the external foragers instead.
→ Bait hive.
We had set up a bait hive just in case another family swarmed again, so this was ready to go for the log hive that changed it’s collective mind. This is an empty hive that a family can automatically choose to move into, or is there ready for a beekeeper to move a swarm into manually.


Images: 1. The national hive listing forward slightly with two full boxes on a stand; 2. Ratchet strapping a honeybee hive to its stand so that it can be moved backwards to prevent it listing forward any further; 3. A honeybee lands on my gloved hand; 4. Mud on my face after hitting a honeybee that had landed on and consequently stung my nose.
Maintenance.
→ Worms — don’t forget to put the lid back on.
I had a moment of dejá vu, where I went to the vermicompost area to get some castings, only to find that my colleague had neglected to put the lid back on during the previous session three days prior. The same thing happened the previous year, by another colleague. With wind, or a fox, the whole stand had toppled over; worms had absconded and what castings existed had now dried up.
As the wooden pallet they were sat on had rotted in sections, it needed to be replaced anyway, so this was an opportune moment to just sort it all out. As usual, I revel in satisfaction of tidying tasks such as this. New pallet in place, stands topped up, and overall easier to access too.
→ Watering — genuinely despise summer because of this task.
Watering takes hours. Not only do you have the crop changeover watering to do, but all the other watering too, because rain is sporadic and honestly, a lot of our veg and herb beds simply have poor soil because we haven’t been amending them well enough. With clay they become waterlogged and so water doesn’t drain, or the surface is dry and crackled and water sits on top then pools in the pathways instead. You’ve then got to water the staging and propagation areas, including the outside cuttings trays where the honeybees come to drink (and now newts come to reproduce).
We have irrigation pipes, these ones called “seephose” — or seep-o’s? — that will slowly drip water onto the soil and down, which means the soil and plant roots are watered rather than the plant leaves. But when you have four tap hoses attached to the various seep hoses across the garden, the water pressure goes down and the beds just aren’t watered with enough volume for enough time. Also, our pipes leak at the corners and they’re a pain to fix. So often, a lot of the beds are instead manually watered i.e. by hand, but with the polytunnel and glasshouse of tomatoes for instance, a good watering can take an hour for this alone.
Tomatoes are at risk of blight if the leaves are splashed with water, so you need to water down into the soil. Similarly with other heavy feeders such as the curcubits, you need to get their roots and you need to get them soaked. If you’re standing with a hose watering the air (which I’ve seen colleagues do), you’re just watering the air and that water is evaporating. If you’re watering the plant leaves, you’re just encouraging them to transpire. You need to water the soil and you need to water more than you think, particularly if you have to water say at 4pm before hometime; but realistically we need to water at dawn and dusk during summer, and that’s just not practical.
Watering the staging also involves a mollusc and caterpillar sweep, by picking up all pots. We have a sand reservoir, so this is filled up; it drains freely, stays moist, and the plants in their pots can root down to find water. We also top water the potting or seed mix of plants in pots so that they retain moisture here too. You can imagine how much time this all takes up.
→ Wood chip — a battle for space.
We have a constant battle of housing enough wood chip for our needs, mostly because access is a pain. Our builders tidied and re-concreted a patch for us, with barrier to boot, so that we have a specific area for wood chip deliveries. Now we just need the tree surgeons to prune and be in our area to do a drop off.


Images: 1. The vermicompost area with fresh pallet for the two worm bins to sit on and both fed veg scraps and wet cardboard. 2. A bucketful of fresh worm castings to feed the tomato plants; 3. A photo of when people borrow your hose and leave it not standing up and in the pathway; 4. Our new concreted wood chip storage area; 5. Watering the gravel-filled shower trays for the cuttings and bees.
→ Pruning.
Summer pruning involves removing the excess foliage so trees, shrubs and vines have more airflow (so reducing chance of mildew), they can divert energy into flowers and fruits (rather than photosynthesis), and so that the gardener has easier access to the crops. It’s less about training for shape, and more about keeping the plant healthy.
I started doing the kiwi, known lovingly as Jenny for this is the variety name, but she climbs up the castle building so needing a ladder or a clamber on a shed and on that day I just wasn’t in the mood. I was also quite itchy from the hairs found on the vines and it gets a bit too much to deal with. We’re in early June and she’s just continuing on as usual until we get back to her.
Others were doing the apple thinning, which involves removing excess proto fruit from the branches and any water shoots. This gives the slightly bigger fruit more room, and energy is diverted into those instead of producing lots of smaller fruit. Annoyingly apple trees do easily throw off these unready fruits, so it feels slightly destructive to remove so much; if you weren’t cultivating for food then for the most part you could let your orchard do it’s own thing. The baby apples litter the floor so becoming organic matter via the help of soil microbes — or if you really want to utilise everything, then harvest them and make a jelly (but otherwise inedible).
Additionally we needed to start on stone fruits and all the currant bushes. Frankly I’d forgotten about the latter, just letting them be bushy. For some reason the task of pruning the some 60 currants and gooseberries is a happy place, where I can squat or sit and transform these plants, despite being nibbled by bugs hiding under the soil or getting scratched by thorns. I’d heavily pruned our cherries last summer post-fruiting, and so it’s delightful to see the proto fruits starting to blush with colour.
→ Pot sorting.
With us selling excess plants, we were running low on plastic pots, so I did a call out on social media and our community responded. We received so many pots and that of course meant doing some consolidation and sorting, and my colleagues received a warning that they had to heed my tidiness. Unfortunately animals and other people do visit the back of the polytunnel, so I imagine in time, my carefully sorted crates will receive a sad demise.


Images: 1. Instructing the trainees on thinning apples; 2. The kiwi in flower; 3. A currant bush in need of summer pruning; 4. Sorting plastic pots into size order and type; 5. Then organising the pots into neat labelled crates.
Plants.
→ Tomatoes.
The toms were planted into our polytunnel and glasshouse, and extra plants were sold. Some were eaten and replaced. A trainee made a map of the many varieties so we can monitor the yield and any signs of blight (which we may have experienced the previous year). After many years of doing this, I have a better idea of what the different varieties’ habits are, and so where they’re better off being planted; for instance Blue Fire is a late ripener so needs a bit more warmth, and the heritage varieties are stout and bushy so need to be at the front.
We dig a hole, put in a small handful of worm castings for concentrated nutrition, water deeply, and then plant, minimising root disturbance and with a tamp down to ensure the roots are stable. Twine from up above is knotted around the stem base and the plants are twisted clockwise, so creating a taut line for them to grow up. We do weekly training, where elbows are pinched out, lower leaves are snipped and the stems are wound around the twine, plus a feed with comfrey tea into the roots. As the season develops, extra bushy leaves will be trimmed in half to provide better airflow.


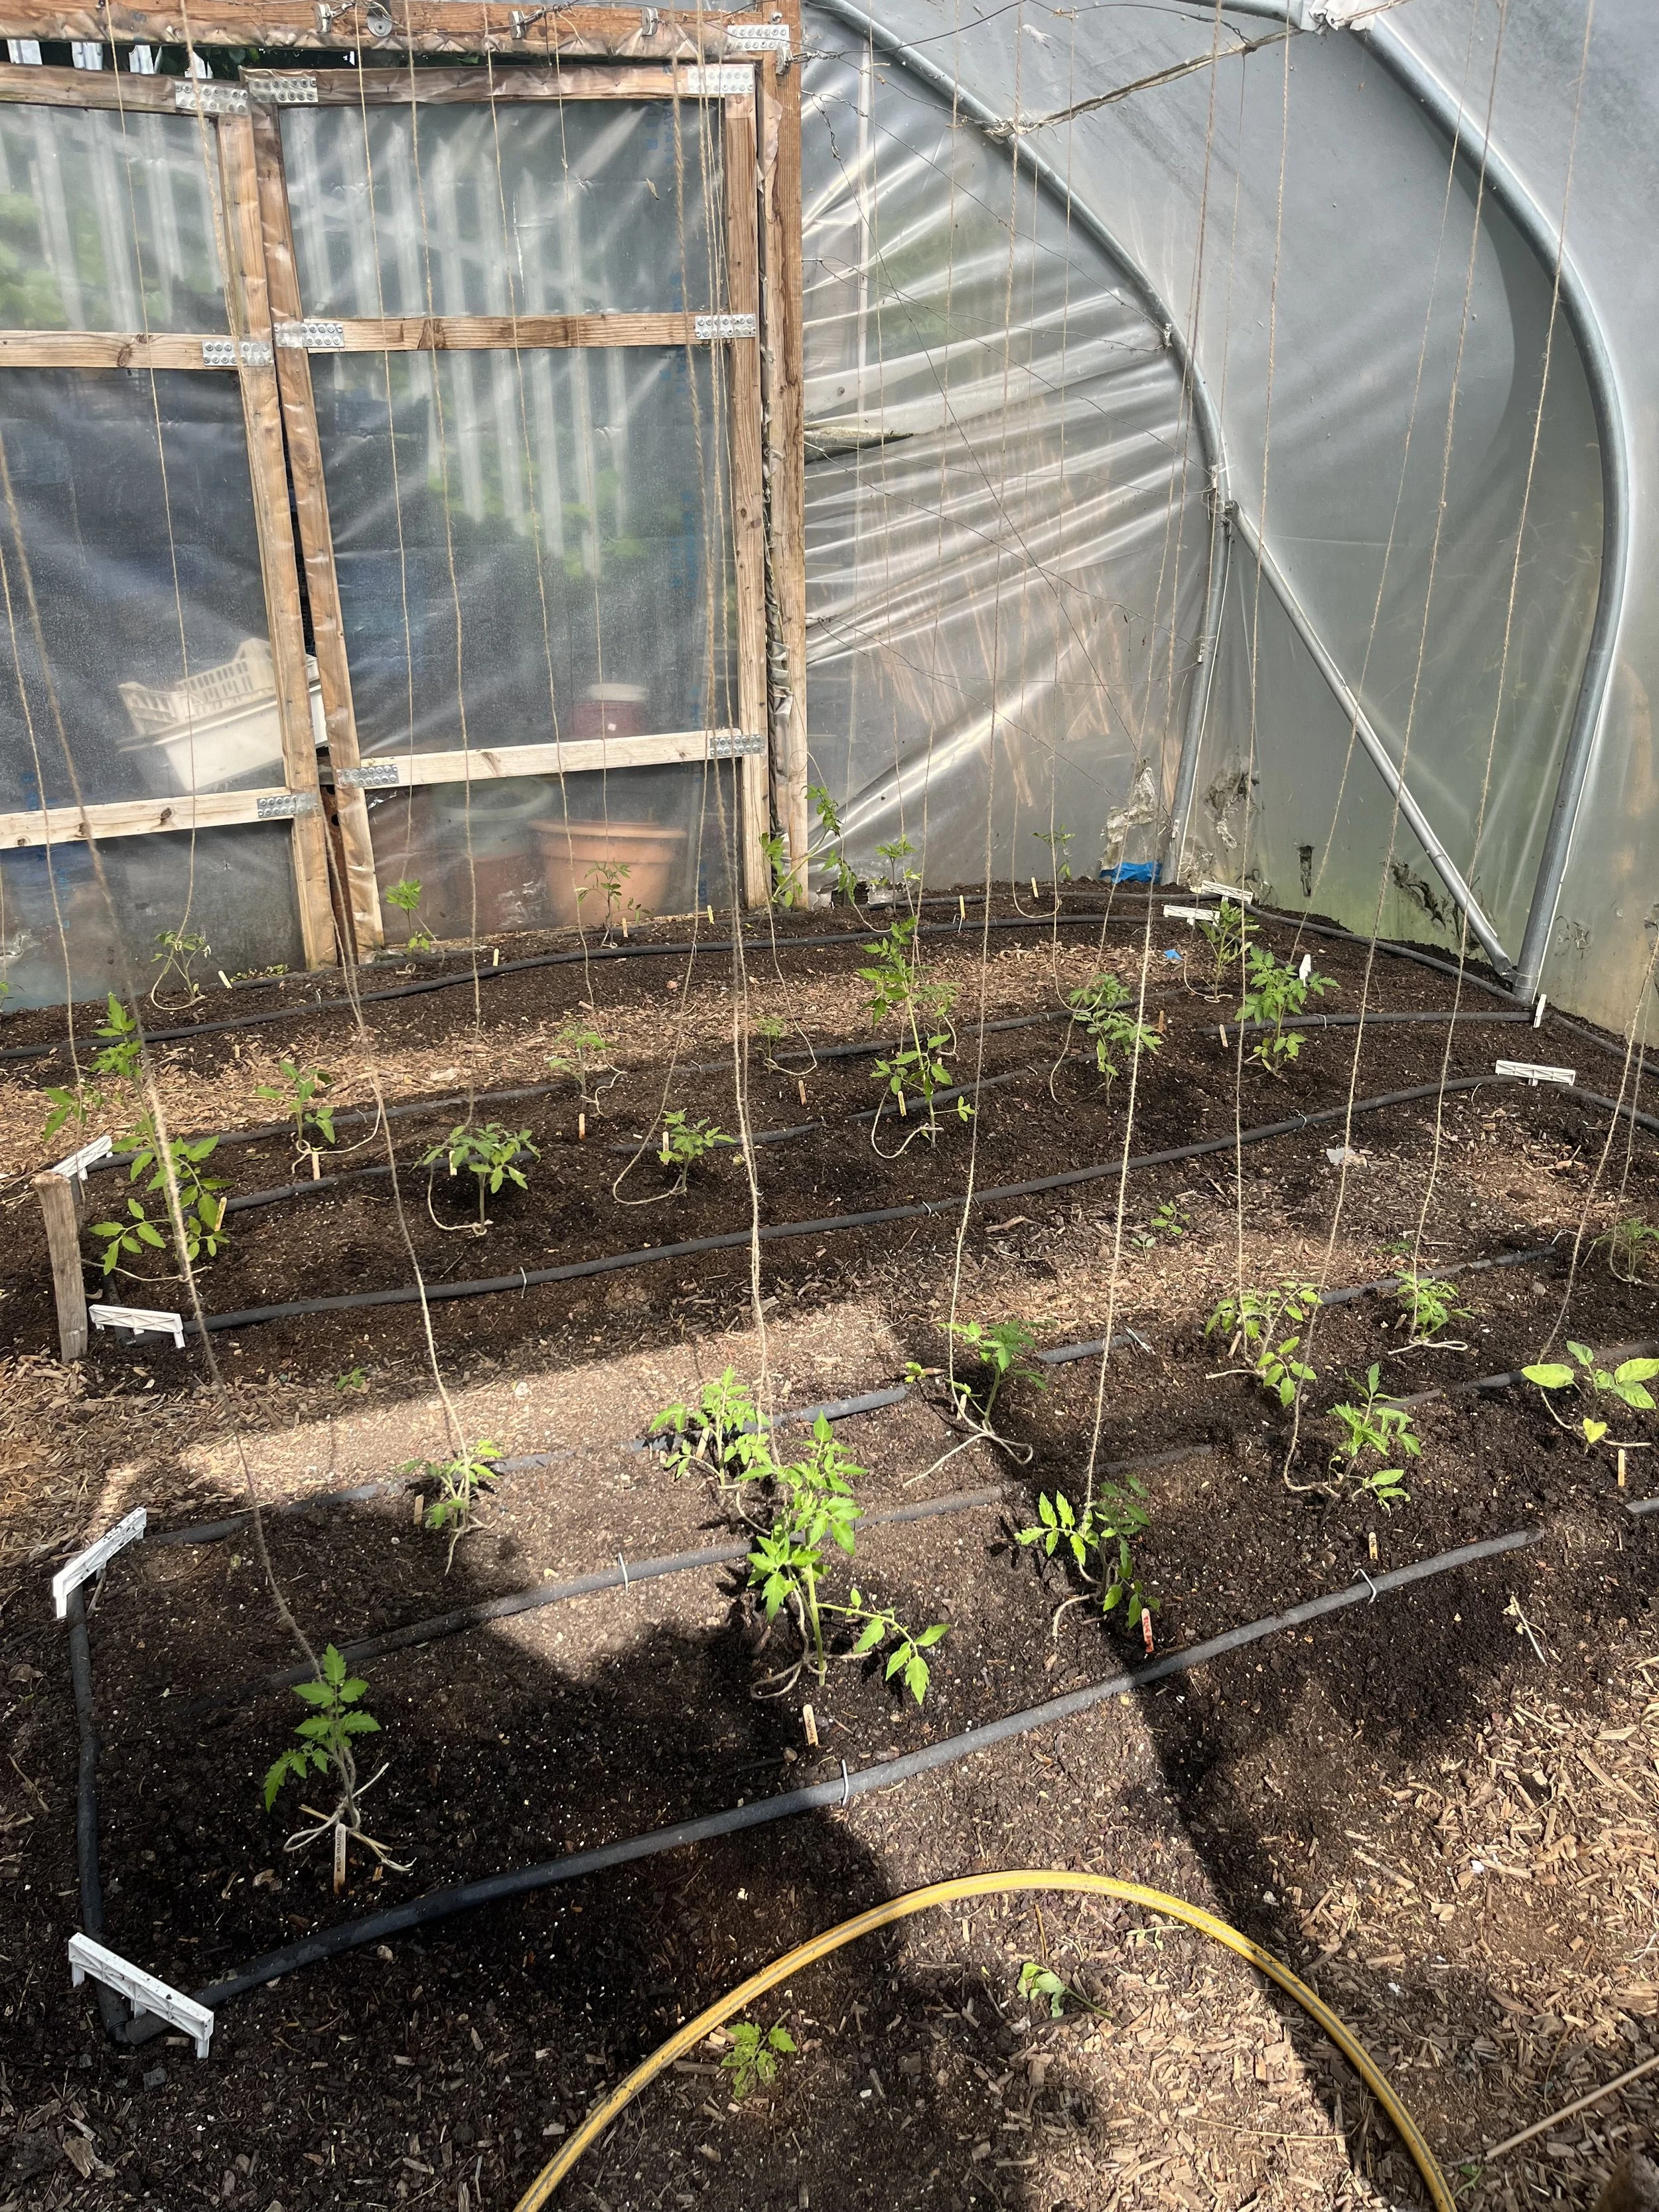

Images: 1. Tying on new strings to mark the plant locations; 2. Selecting the diversity and balance of tomato varieties; 3. Filling holes with worm castings and watering deep; 4. Tomato plants in place in the polytunnel; 5. A sweaty face on being in the polytunnel on a hot day.
→ Potting on.
Curcubits especially don’t like their roots being disturbed, but when they’re sown in small modules, they simply need additional nutrition that seed mix doesn’t provide, and their roots need more room. So the courgettes, squash and cucumbers are carefully potted on. To tell them apart, each pot is labelled, and then kept separate in the staging areas, plus for added measure the squashes go in orange pots while the others get black. I was asked by a friend how to tell the difference between cucumbers and courgettes, and to my eyes it’s that the courgettes have an indentation in their leaves similar to grapes, and cucumbers have a more velvety fluffy surface rather than spiky like courgette.
We also had some random stuff, like fennel, dill, sorrel, salad burnet and spring onions to pot on. I still haven’t gotten to my dye plants.
The courgette and cucumber plants large enough (to withstand mollusc nibbling) were planted out. Courgettes were undergoing an experiment; part of a bed was sheeted with plastic Mypex to see if heat retention helped growth. They’re planted out into a deep hole that again has a handful of worm castings and lots of water, and soil is mounded to help with stem stability and water retention. The same for the cucumbers, except on this day I don’t know if it was my communication or the trainees’ not listening, but my instruction was not followed and it became incredibly tiresome. It’s a fine balance when giving information to not be condescending or micro manage, wanting to give people the benefit of learning from potential mistakes, but also knowing that you have minimal plants and one chance to get it right.
→ Gifts.
A garden friend had extra saplings needing homes, so we received a True Service tree and three Nepalese peppers. The service tree is pretty rare and special, so we’ll keep this in a pot until it grows on (potting into a bigger container when necessary) and we have a suitable location for it. The peppers also will stay in pots because right now they’re tiny. We used to have a Szechuan pepper somewhere in the garden, that I do remember a handful of peppercorns coming from. The underside of the leaves when rubbed give off a hot smell, so wonder if these can be placed in our Sensory Garden.


Images: 1. Potting on cucumbers while I wait for a swarm to clear; 2. Mypex plastic sheeting being laid down on part of the courgette bed; 3. The leaves of the gifted service tree; 4. A variegated nasturtium leaf; 5. A hard-shelled shiny silver mushroom on a log looking all alien-like.
Learning.
As we have trainees, we share responsibility of hosting tutorials on various topics around food growing, particularly for kitchen and market gardens. This one was about soil, and as I actually haven’t done anything technical on soil since I was taking a certificate in Forest Gardening, thought I’d sit in on my colleague’s session to see if I remembered stuff — and also to get tips on teaching styles. I’d had feedback that I cram in too much, which I’m aware of already, but how can you remove stuff that is integral to better understanding the other stuff? My sessions will be on herbs and bees. I’m not actually experienced enough to teach on herbs, but my other colleague isn’t up for leading on that.
We received an introduction to what soil is, soil types, soil textures, and also the role of fungi. We did a sweet soil test that was the least technical version but still useful accessible knowledge, and then trainees were wowed at the lightness of a wooden log completely eaten by mycelium.


Images: 1-3. A session on soil learning about what the composition of soil is, how soil is formed, and a fun soil test down in our forest garden to check whether a soil type is silt, clay, sand or loam.
Wildlife.
The most exciting is the family of newts. Our glasshouse seemed to have a resident newt (that I accidentally broomed over winter), but he survived and we found him in the gravel-filled shower trays used for housing outdoor cuttings. Alongside him was a female newt and many many babies. I’d placed some round plastic trays upside down on the water to give honeybees a landing pad when drinking water, and the newts had taken up residence underneath. Unfortunately I had to move loads of currant cuttings across to here, consequently making their amount of swim space smaller but also providing them more shade. The cuttings had to be moved as bindweed has found it’s way in between the glasshouse glass panes, and our builders were going to assess if it can be sorted.
The neighbourhood cats were also spotted more, including a Norwegian something who was particularly curious, and a black one we’d never seen before. We wonder if word had gotten around about the staff room mice and all the cats were coming to help out. Or, the fox really wasn’t denning in our grounds anymore and that’s why they were around. I’d in fact seen our fox in my own garden close-by — or at least, he looks like Rufus — with three cubs.
The molluscs frankly don’t even deserve this space, digital or physical, but they’re around and they seem worse than usual.


Images: 1-3. Baby newt, daddy newt and mummy newt in a watery gravel-filled shower tray; 4. Black aphids on a rhubarb flower.
Textile therapy.
In April I decided to set myself an activity of eco printing with petals and leaves from the garden and various other local green spaces. In fact I ended up only doing the one, on May 1st; partly because it kept raining so plants stayed damp, which isn’t conducive to hapa zome plant pounding, and partly because I feel a barrier to spending time doing creative stuff like this when I should be doing other things.
But, the May 1st print of every single flower found in the garden turned out pretty and it’s in my room now with pigments slowly fading. Doing a June one to compare would be good.
On May 12th I led an intimate nature weaving workshop in the park, taking the friend couple on a foraging walk to collect textile-like plant materials to weave with.
I also led an introduction to bundle dyeing session, which was a little more frantic than anticipated because of course people don’t stick around only for the advertised hour, and of course children come with adults who don’t pay you for your skilled time and guidance. I’d put up a suggested donation on a pay what you feel scale, but FYI and future reference, a brownie from the place you work is not a useful payment for labour of teaching, cost of materials, time in plant foraging and drying, and electricity for the induction hob. I should’ve been there doing actual garden work too, so I utilised the volunteer lunch break to guide our regular garden volunteers in bundle dyeing, paying back the fact I’d left my colleague on his own to manage them. And everyone (including my two paying customers and staff that I’d offered to come for free) had a great exploratory time. A dad of one of the kids did come back later to collect the piece and gave me a tenner saying his son had a great time. It is worth it when you see the magic that happens, but it’s also utterly draining — and then I did have to go to and do some “real” work.


Images: 1-2. Hapa zome flower printing onto cotton fabric; 3. A nature weaving workshop in the local park; 4-5. Bundle dye workshop in the garden using fresh and dried plant materials on cotton fabric, socks and t-shirts.
I arrived into May feeling a little lighter because a big run trip and some doggy daycare was out of the way. But May is the abundant month, when everything bushes and you have way more to do than you have the time for. I shouted at the log hive when it swarmed because we don’t really have space for a sixth family, and I don’t have emotional capacity. I’d taken on casual cleaning shifts inside the building, and with an onslaught of running events, social events, my workshops and an upcoming race, I was feeling overwhelmed in the way that makes you irritable. I didn’t want to be around people, finding myself tiring when I had to speak.
I took solace in the delight of elderflower season to make cordials and eco prints, attempting to be present in that moment, and enjoyed my maintenance moments where I could flow in that particular task. I wonder if my distress in not “achieving” much in April had this knock-on effect of me wanting to prove my worth and successes in May, through the cleaning and tidying. We do tend to sort in order to claw back control. Or perhaps I was simply more physically fatigued than I gave credit to, with my plantar fasciitis still causing discomfort.
I’ve come out the other side into June. I started writing this days ago, but in recovery from an 53km ultra trail marathon, with days of work still required, I’ve had blocks to my memory. I’m looking at my diary and the photos to remember what actually occurred. All the sessions roll into one, which highlights the importance of record keeping as a gardener because you genuinely forget. I’ve found myself saying things like, “the season was just as short last year”, regarding the currants and elderflower harvest, but was that really the case? So many variables affect how you remember something, and what yields you get — if you even harvest at all. I could look back in a year’s time at my photos of the elderflower cordial and remember from what trees I harvested, and an approximate weight of what I took, but I didn’t make note of how much was left — just that I was pleased and grateful with what I did receive from the plant. You build on wisdom each year, with some awareness, though I wouldn’t say I’m able to accurately recall what’s gone on.
With June will come more pruning, hopefully some outreach to customers, some herb harvests, a bit of control over weedy patches as more volunteers visit. In my non-work time I’ll continue to harvest street flowers for workshops, and lead people in textile nature connection. I’ll appreciate the elderflower cordial I have remaining, and try to celebrate solstice. The five honeybee families need nurturing, and my dye plants need a home. You know at the end of Gardener’s World where Monty says something like, “here are the tasks to do this week”, of course it needs to be optimistic, but that man’s got all the time to do all the gardening. The tasks you could do are never what you end up doing, or in fact what you want to do. The plants and wildlife always take charge.